Midjourney now offers the ability to manifest the evolution of your AI-generated images into a concise Midjourney video. This captivating feature visually narrates the journey from the inception of your image request to the culmination of your unique AI-crafted visuals.
To set this feature in motion, simply append the –video parameter to your input prompt. By doing so, Midjourney will not just generate your images, but also a fascinating timelapse video, detailing the birth and progression of your image concepts. To access this timelapse, just respond to Midjourney’s response with an envelope emoji, and a link to your video will be promptly dispatched to you.
But the functionality of the –video parameter doesn’t stop there. It also permits you to retroactively obtain a video capturing the metamorphosis of images you’ve previously crafted using this innovative AI tool. Once you have the link to your generated video, you can effortlessly save it directly to your computer via your browser’s menu.
Midjourney pricing plans and free alternatives to try
There is, however, one key consideration to bear in mind regarding the use of the –video parameter. It is designed to create short films showcasing the full image grid composed of all four AI-generated images, produced based on your initial input. The parameter can be employed while creating variations, zooming, or panning on images as long as an image grid is incorporated. However, it is not applicable for upscaling images, as there would be no transformation process to exhibit.
How to generate Midjourney videos?
Creating videos of your AI-generated image journey with Midjourney is an effortless process. Below are the simple steps to follow:
- To kick-start the process, access any of Midjourney’s servers on Discord, or utilize the Midjourney Bot from your own Discord Server or Discord DM. Navigate to the text box at the bottom.
- Here, input “/imagine” and select the /imagine option from the pop-up menu.

- Now, it’s time to craft your desired prompt. In the “prompt” box, pen your creative concept and conclude it with the –video parameter. Essentially, your input should follow this syntax: /imagine prompt [your prompt here] –video. Replace [your prompt here] with your unique creative idea.

- After shaping your perfect prompt, simply hit the Enter key on your keyboard to dispatch your creative request to Midjourney.
- Midjourney will then initiate the process of bringing your vision to life. Upon completion, you will be greeted with a grid of four images, the end product of your imagination.
- Move your cursor over this response and click on the ‘Add Reaction’ button – a cheerful emoji with a plus sign that manifests at the top right corner of Midjourney’s response.
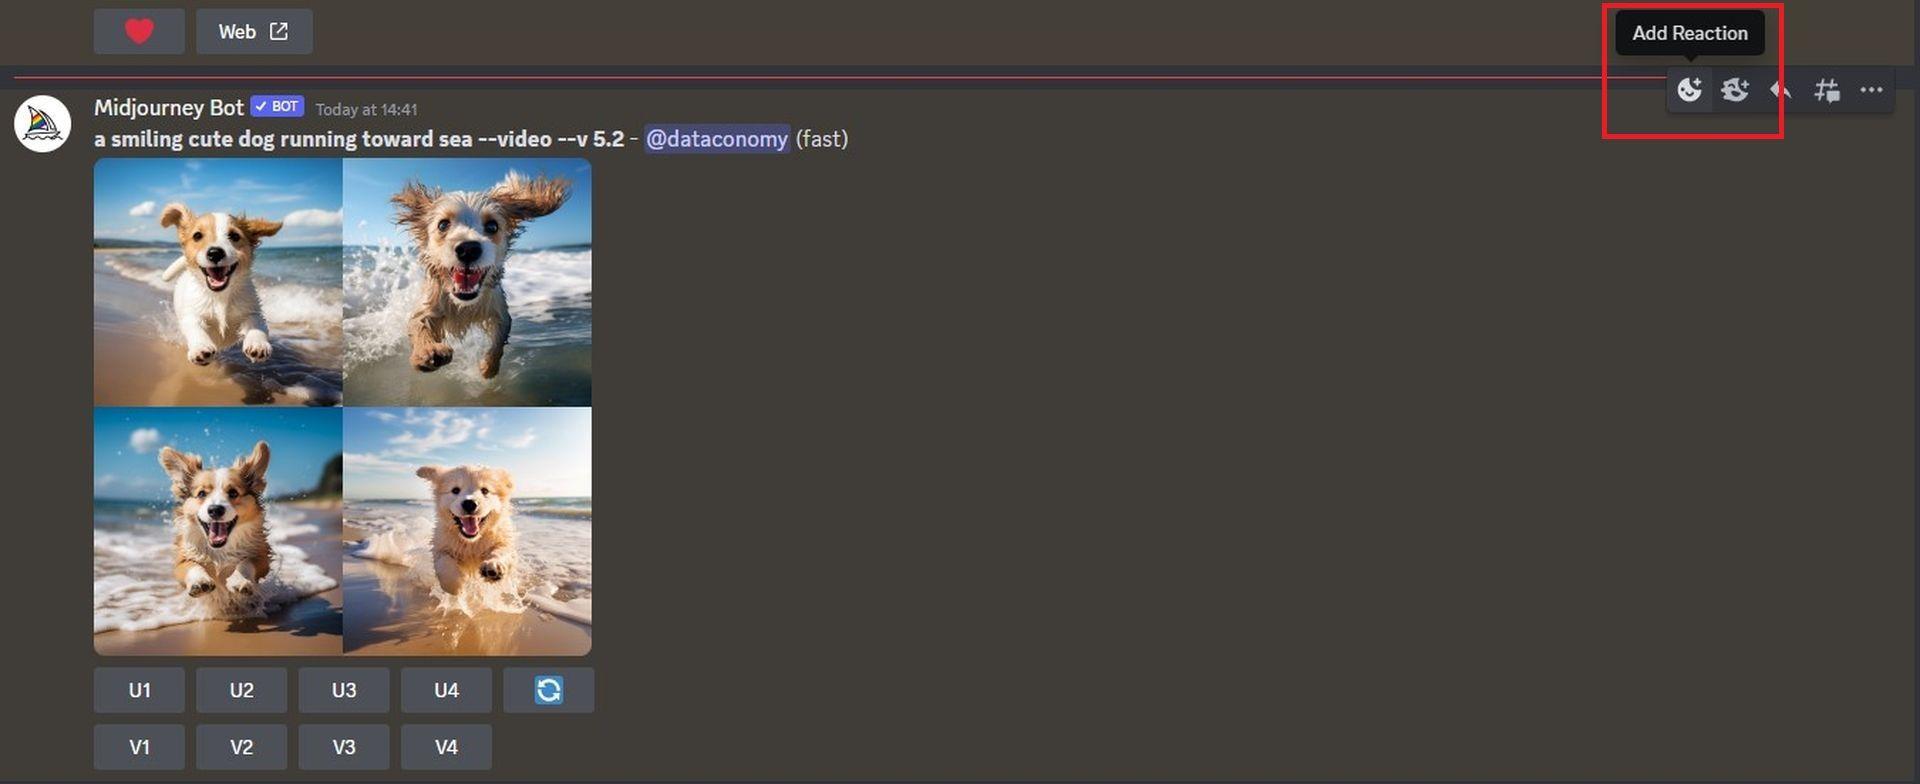
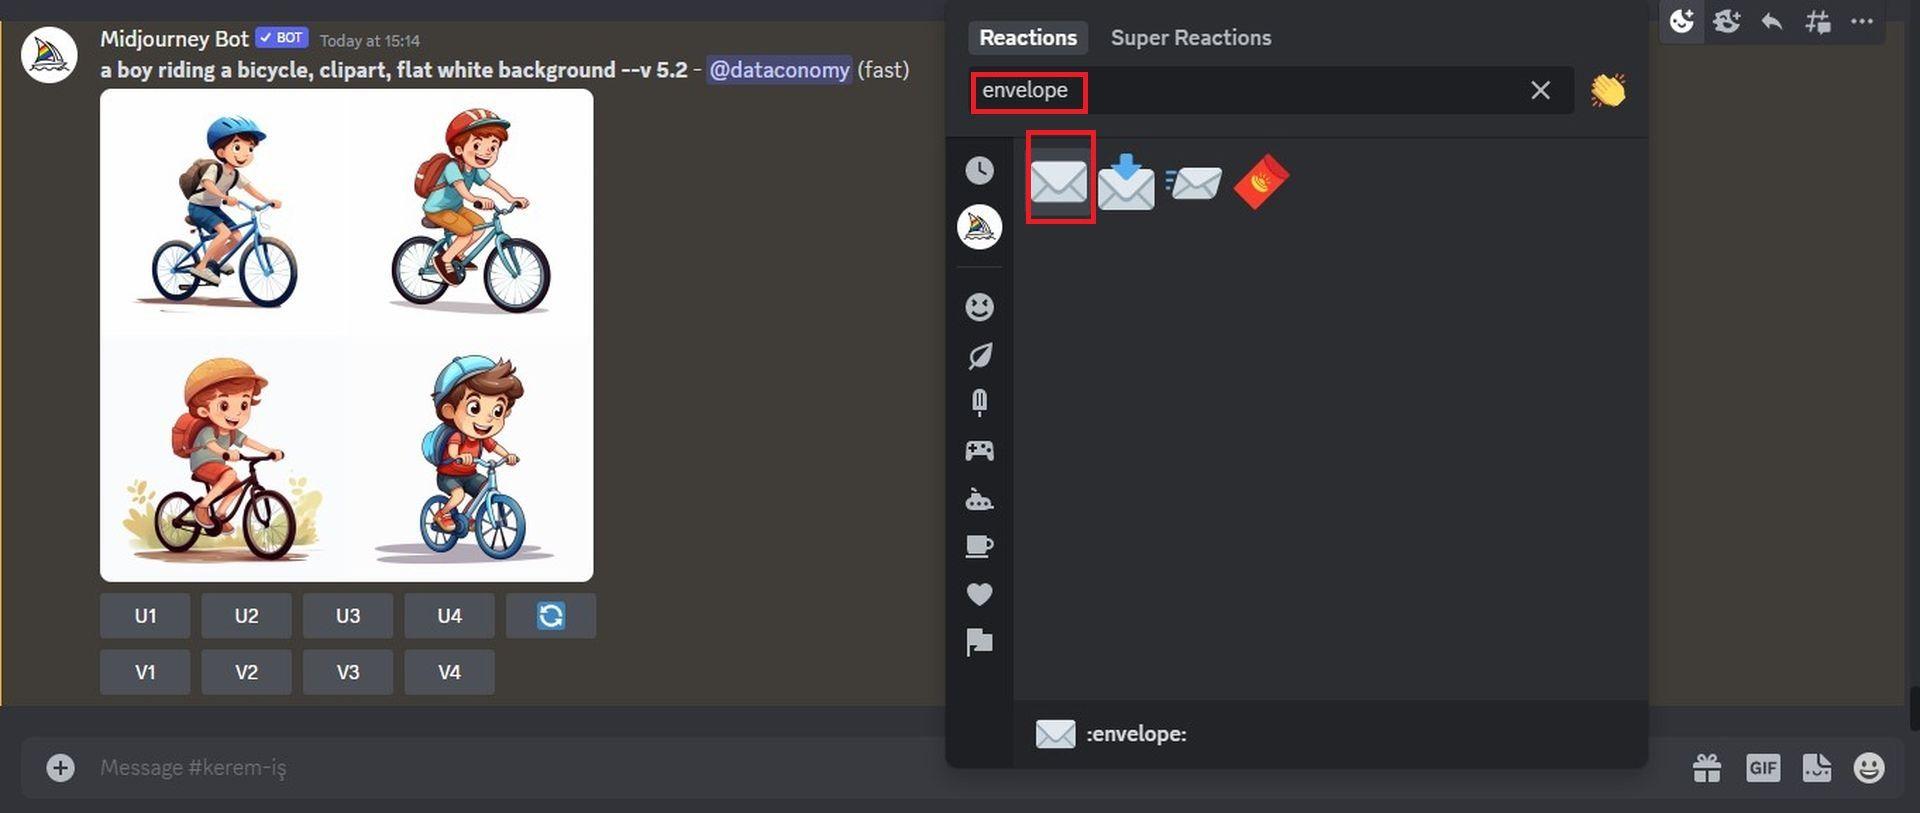
- In the ensuing ‘Reactions’ menu, type “envelope” in the search bar and select the first envelope emoji that surfaces in the search results.

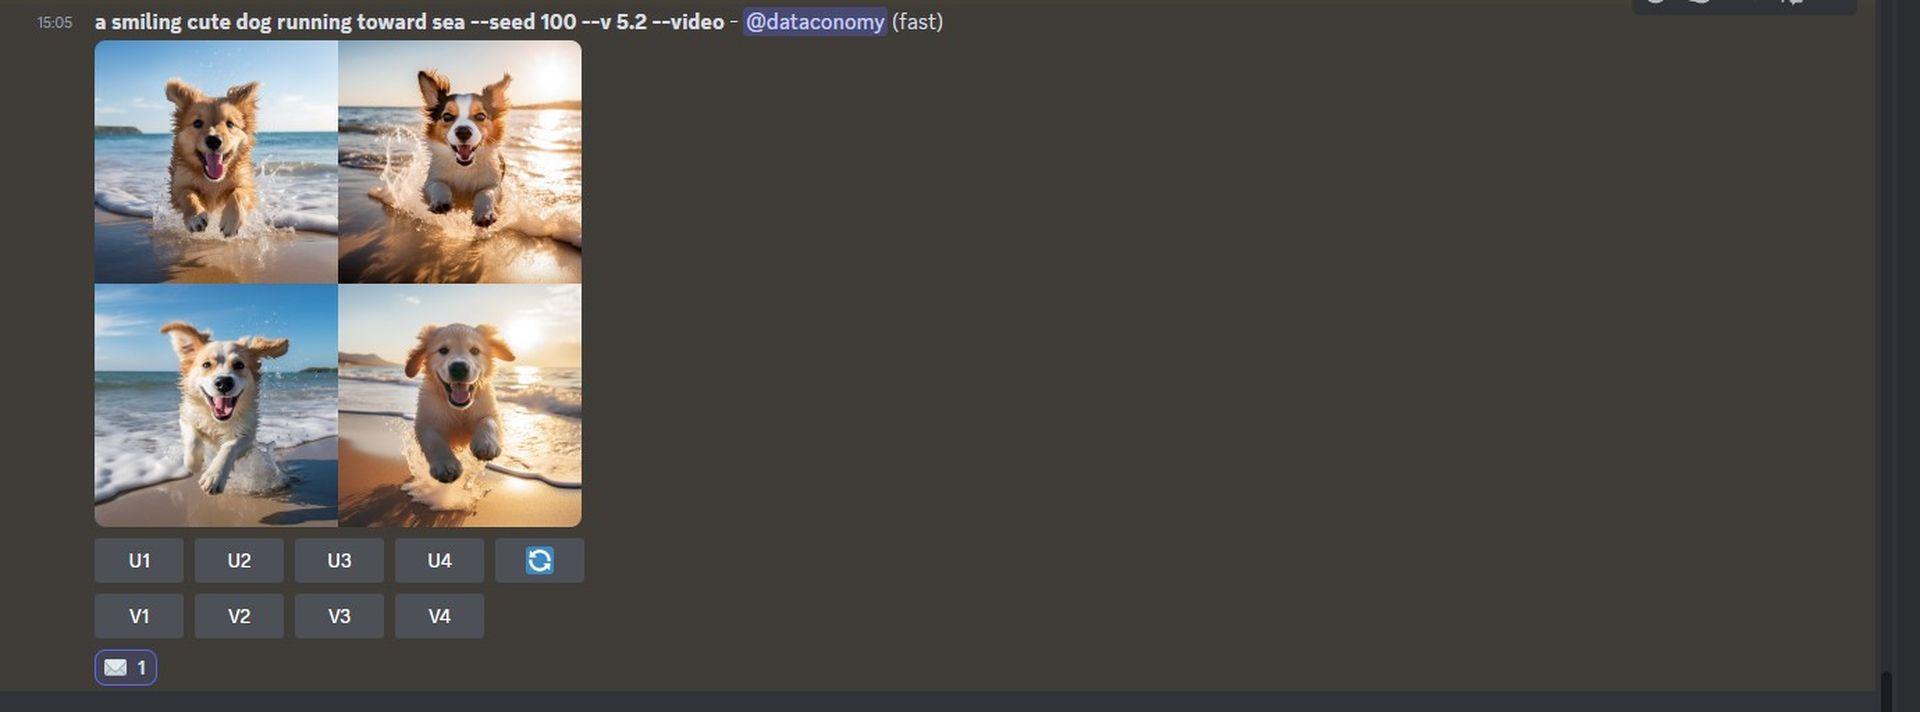
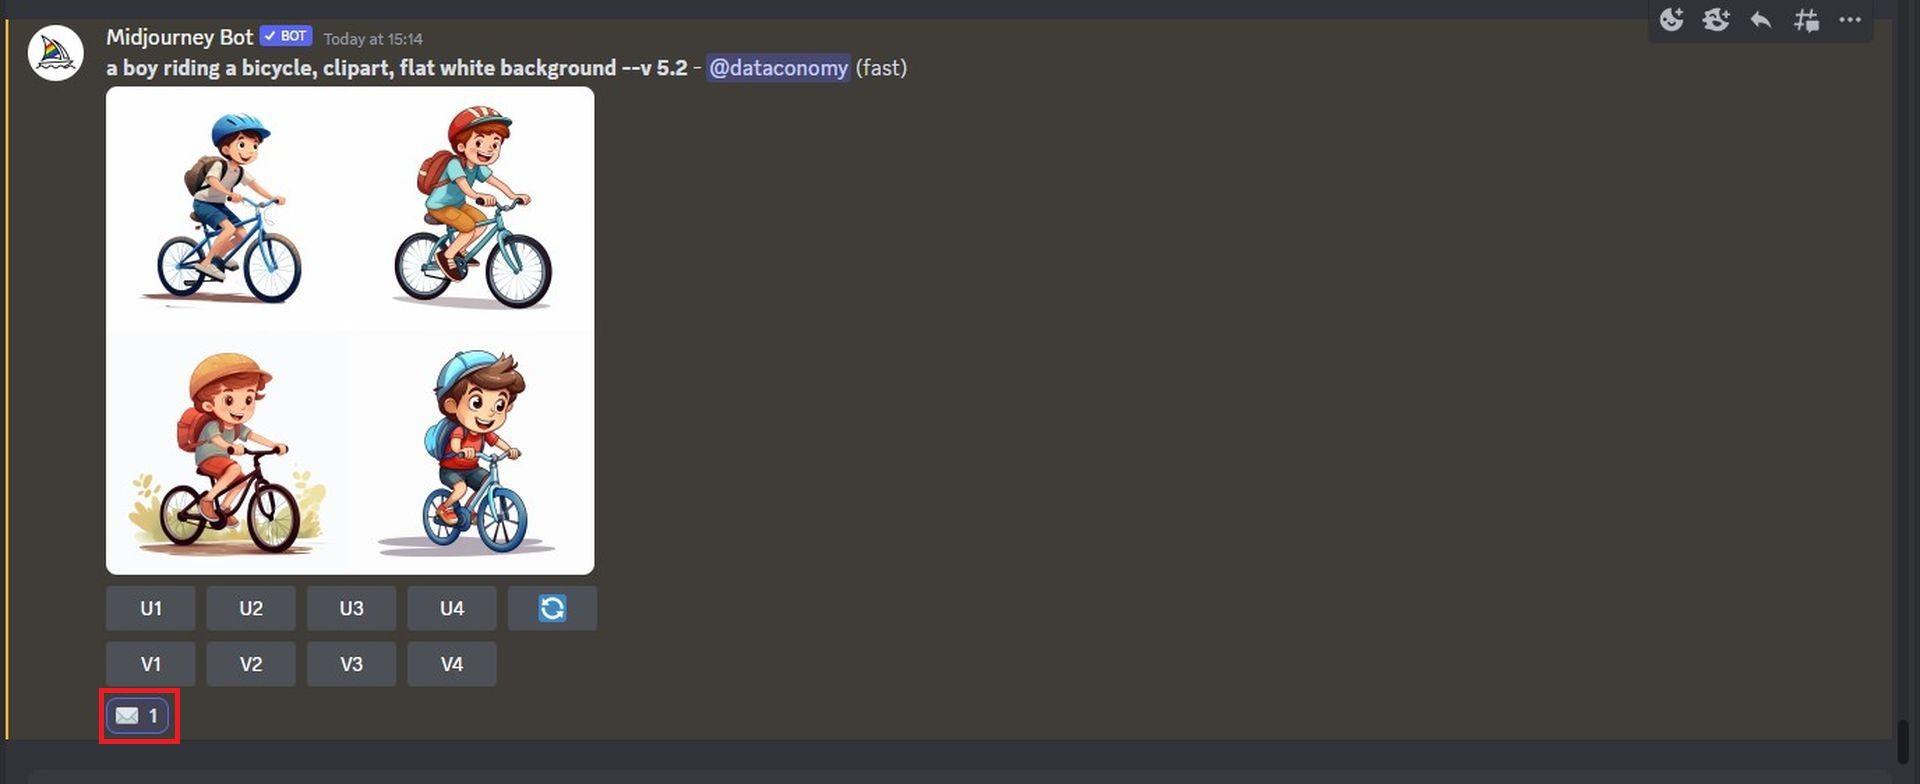
- This envelope emoji will now decorate the original response.
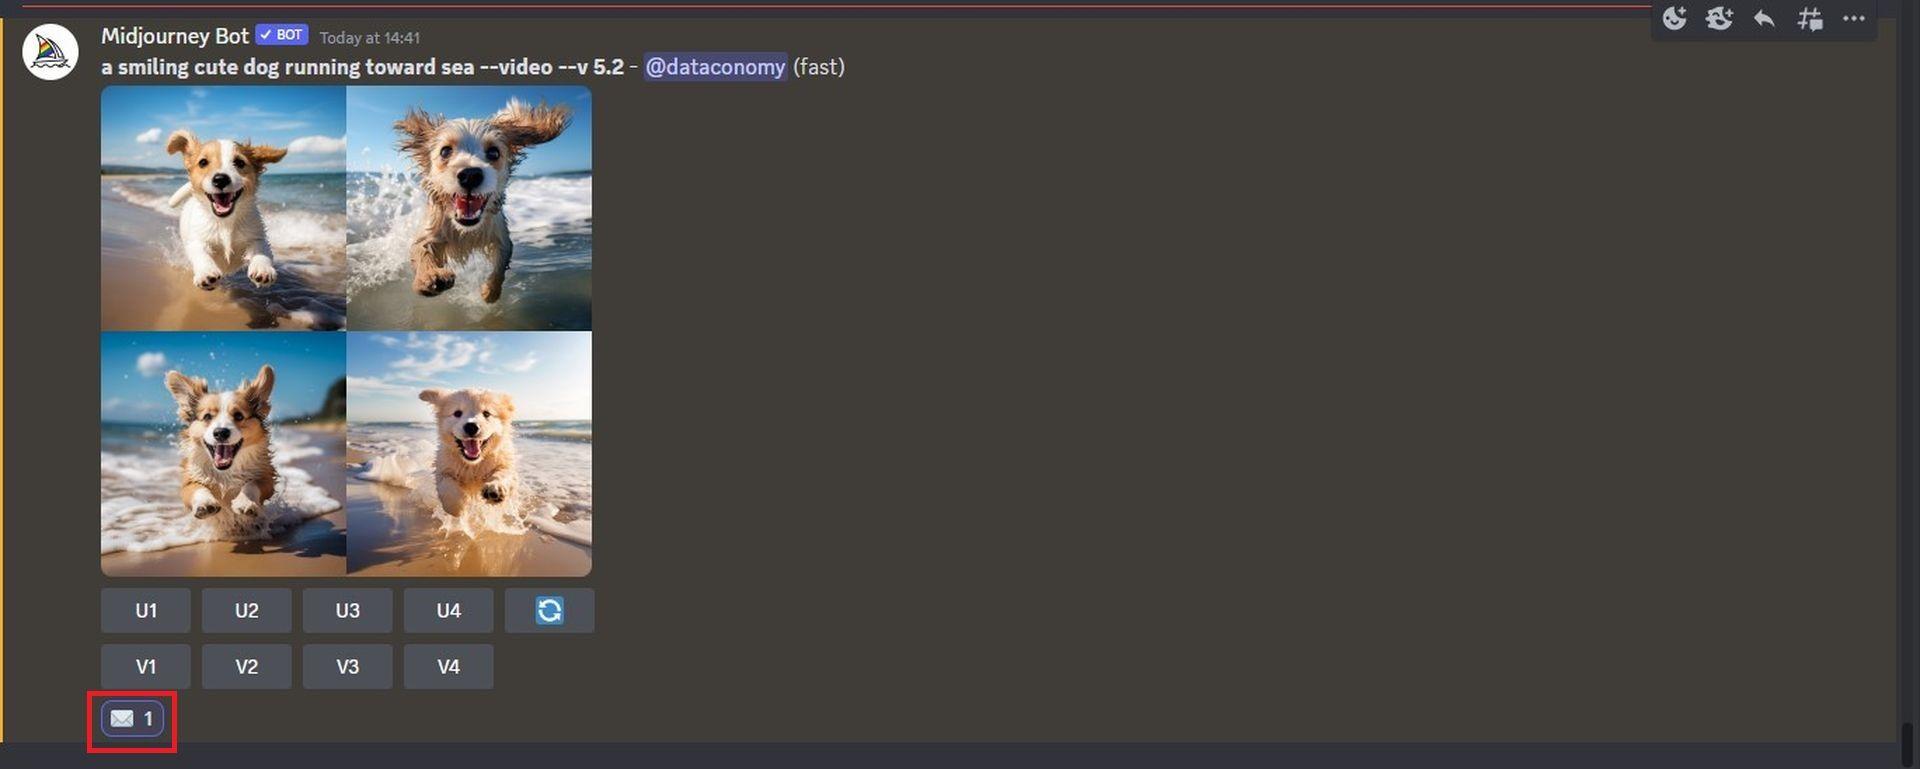
- Soon after, Midjourney will present an additional response, enriched with detailed information about your generated images. This is where you’ll find the golden link adjacent to the “Video:” section.
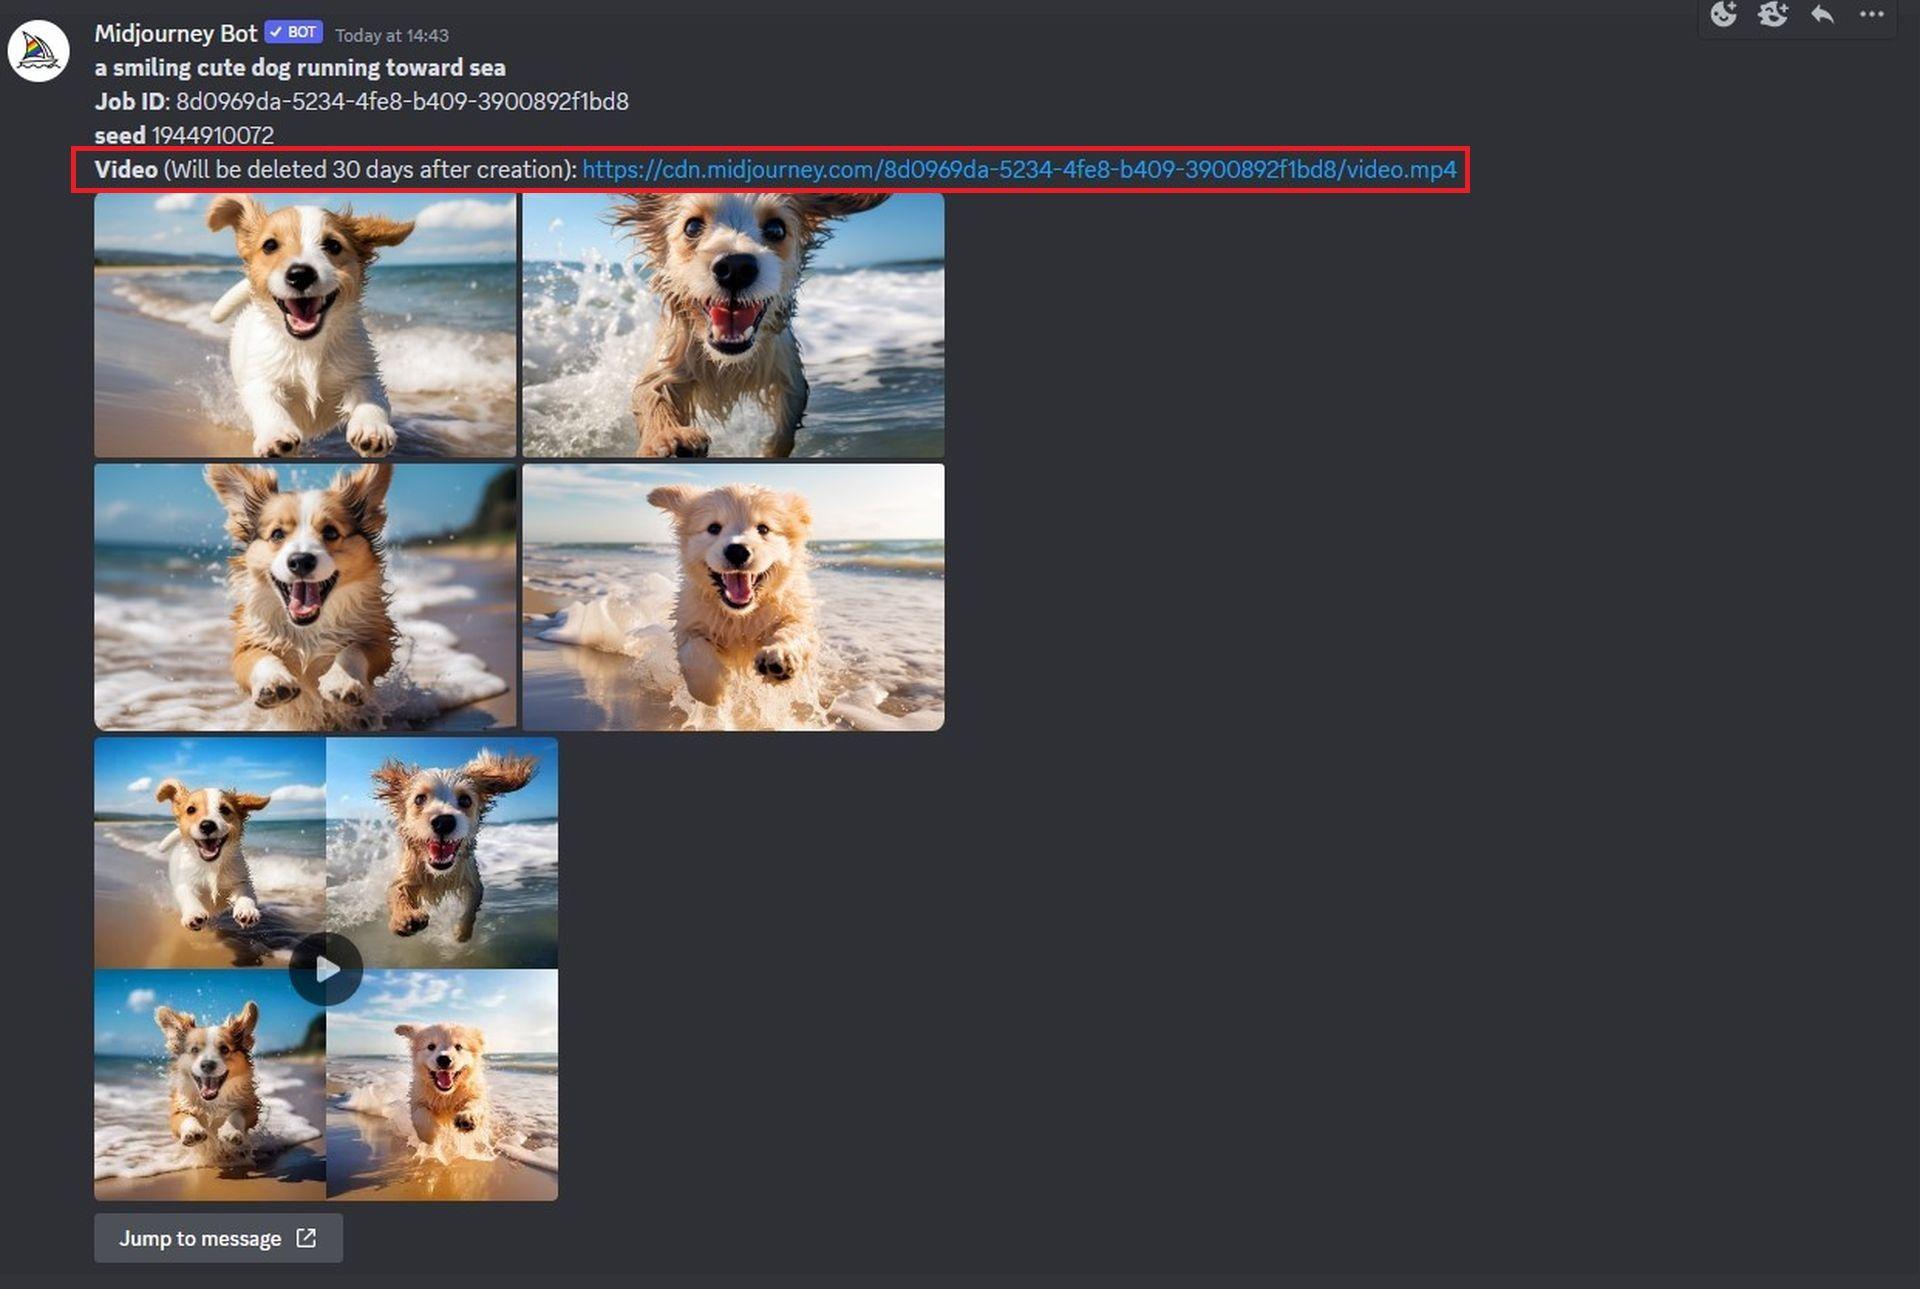
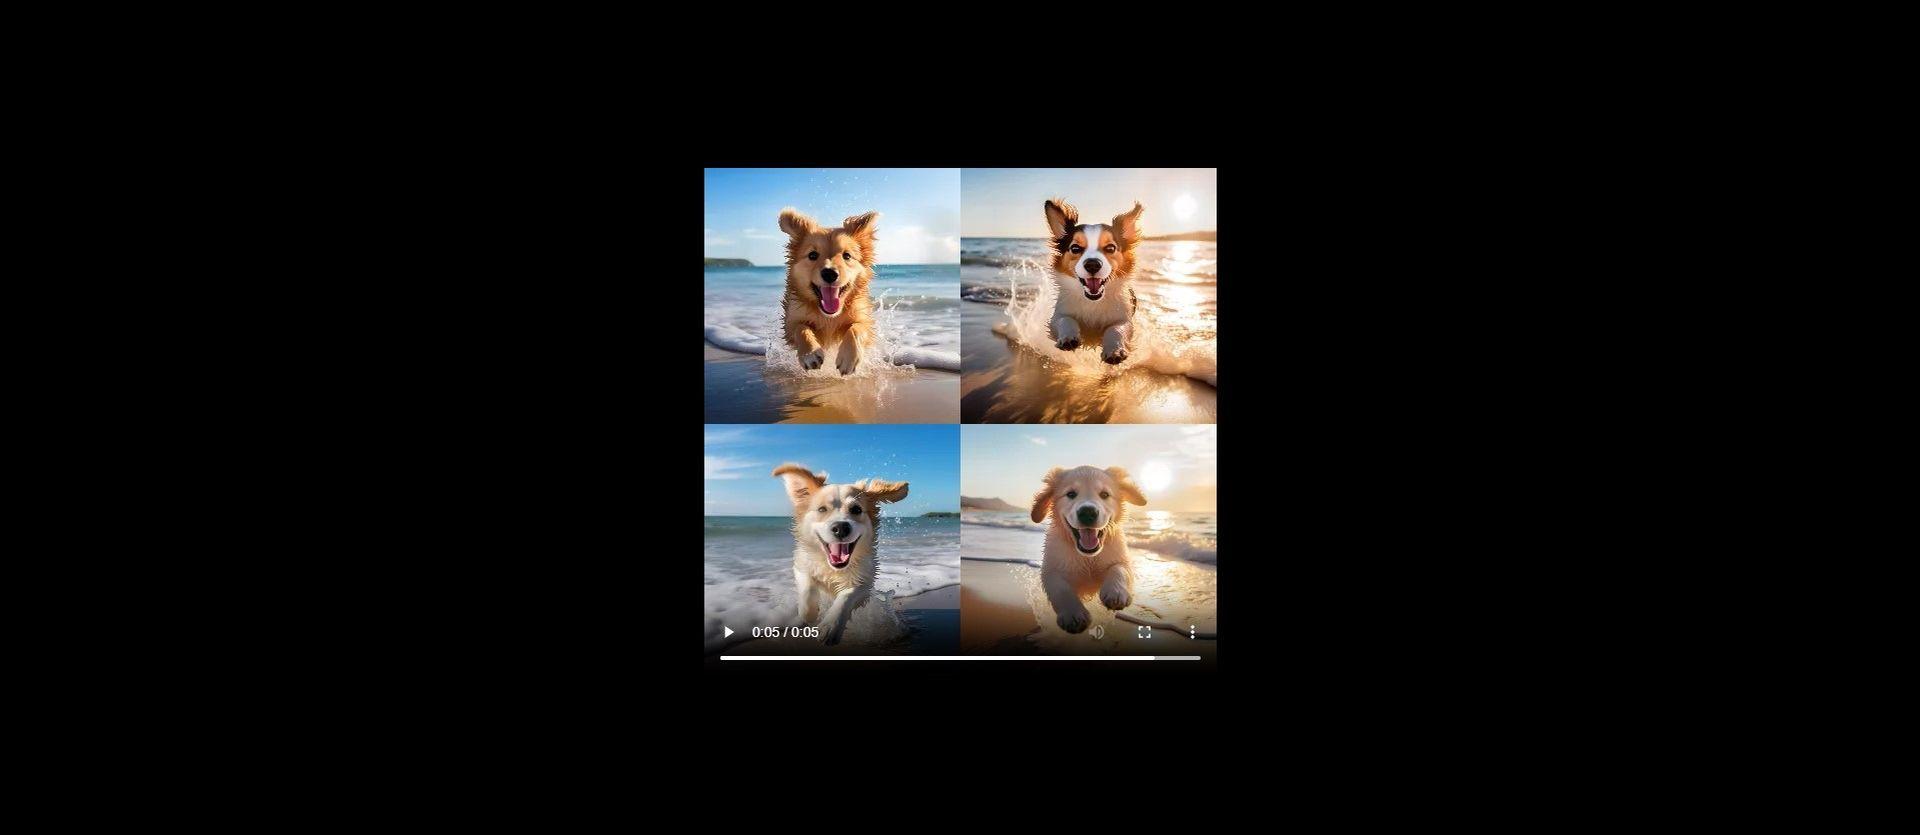
- Click on this link and prepare to be amazed. A new tab on your web browser will open, playing the timelapse movie that Midjourney has crafted from your images.

The subsequent section will guide you on how you can save this video for future viewing and sharing. The creation of a Midjourney video is a seamless and exciting journey in itself!
How to create Midjourney videos of previously generated images?
You’ll be delighted to know that with Midjourney, the video-making possibilities are not restricted solely to your future image creations. Midjourney uniquely provides the option to curate short videos based on image grids you’ve previously generated. The key to unlocking this ability lies in the use of the Seed parameter, or –seed, on Midjourney.
Acting as the AI tool’s creative fingerprint, the –seed parameter enables you to generate identical images or modify images that have already been crafted using Midjourney. Every image grid generated by Midjourney carries a distinct seed value, which serves as the reproducibility passport for your creative concepts. This value can be either predefined by you at the time of image generation, or later retrieved through a detailed summary of your creation post-generation.
Should you wish to breathe life into a video based on an already generated image grid, you can follow one of the procedures detailed below. Your chosen method will depend on whether or not you had initially assigned a seed value at the time of creating your image grid.
Solution 1: Prompts that has pre-defined seed value
If you’re already well-acquainted with the seed parameter and routinely incorporate seed values during your image creations, fashioning a video from the generated images becomes a straightforward task. Here’s how you go about it:
- Launch the Midjourney server, Bot, or your Discord DM where your original set of images was conjured. Next, embark on a hunt for those specific images you generated using a specific seed value.
- Once you’ve tracked them down, ensure that the prompt you utilized to form these images carries an associated seed value. Prompts with a seed value will contain –seed (value) within the input. If your prompt fits this criteria, select the entire prompt text and copy it to your clipboard.
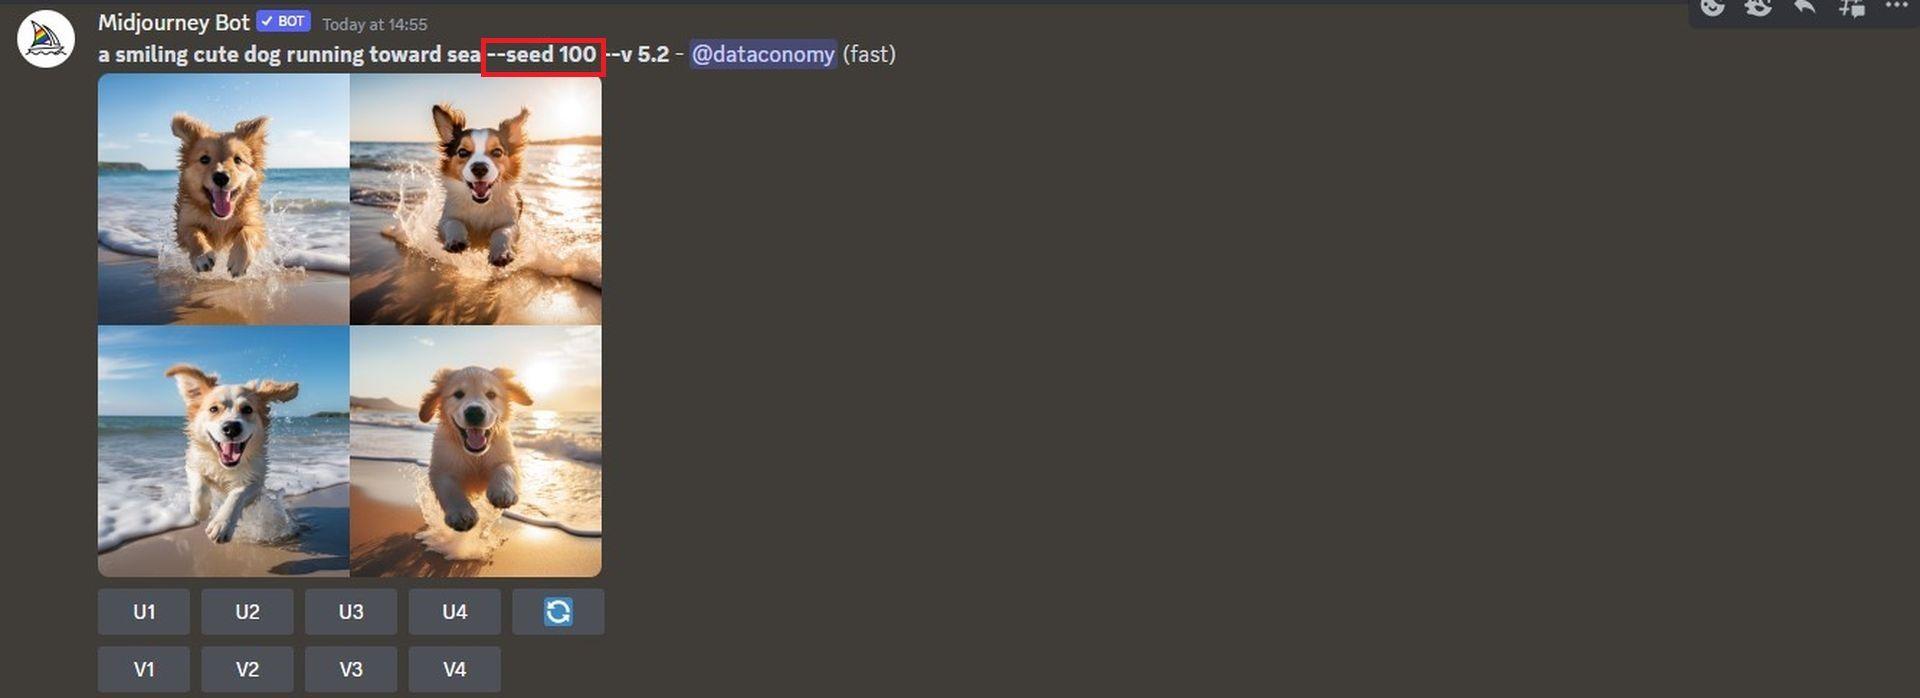
- Now, direct your cursor to the text box at the bottom, input /imagine, and select the /imagine option from the drop-down menu.
- In the “prompt” box, paste the prompt you copied earlier without any modifications.
- Append –video to the end of this prompt and then press the Enter key on your keyboard.
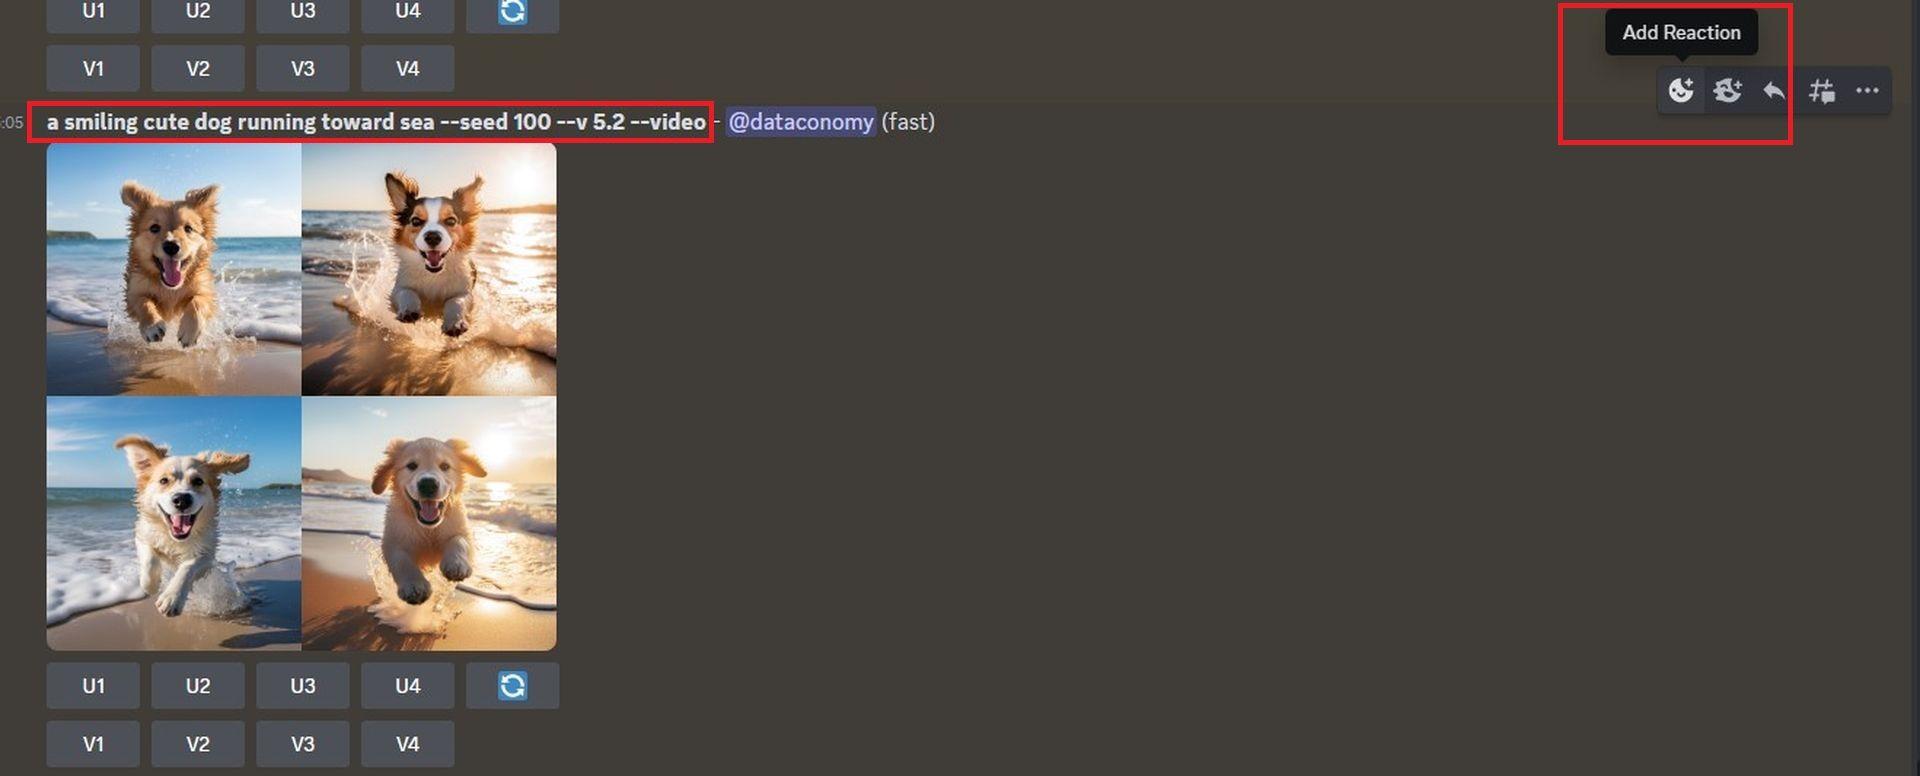
- Now watch as Midjourney brings your previously crafted images back to life in a fresh response. As soon as the image grid is fully processed, hover over this response and click on the Add Reaction button – the cheery emoji icon adorned with a plus sign, situated at the top right corner of Midjourney’s response.
- When the Reactions menu materializes, type “envelope” in the search bar at the top and select the first envelope emoji that pops up in the search results.
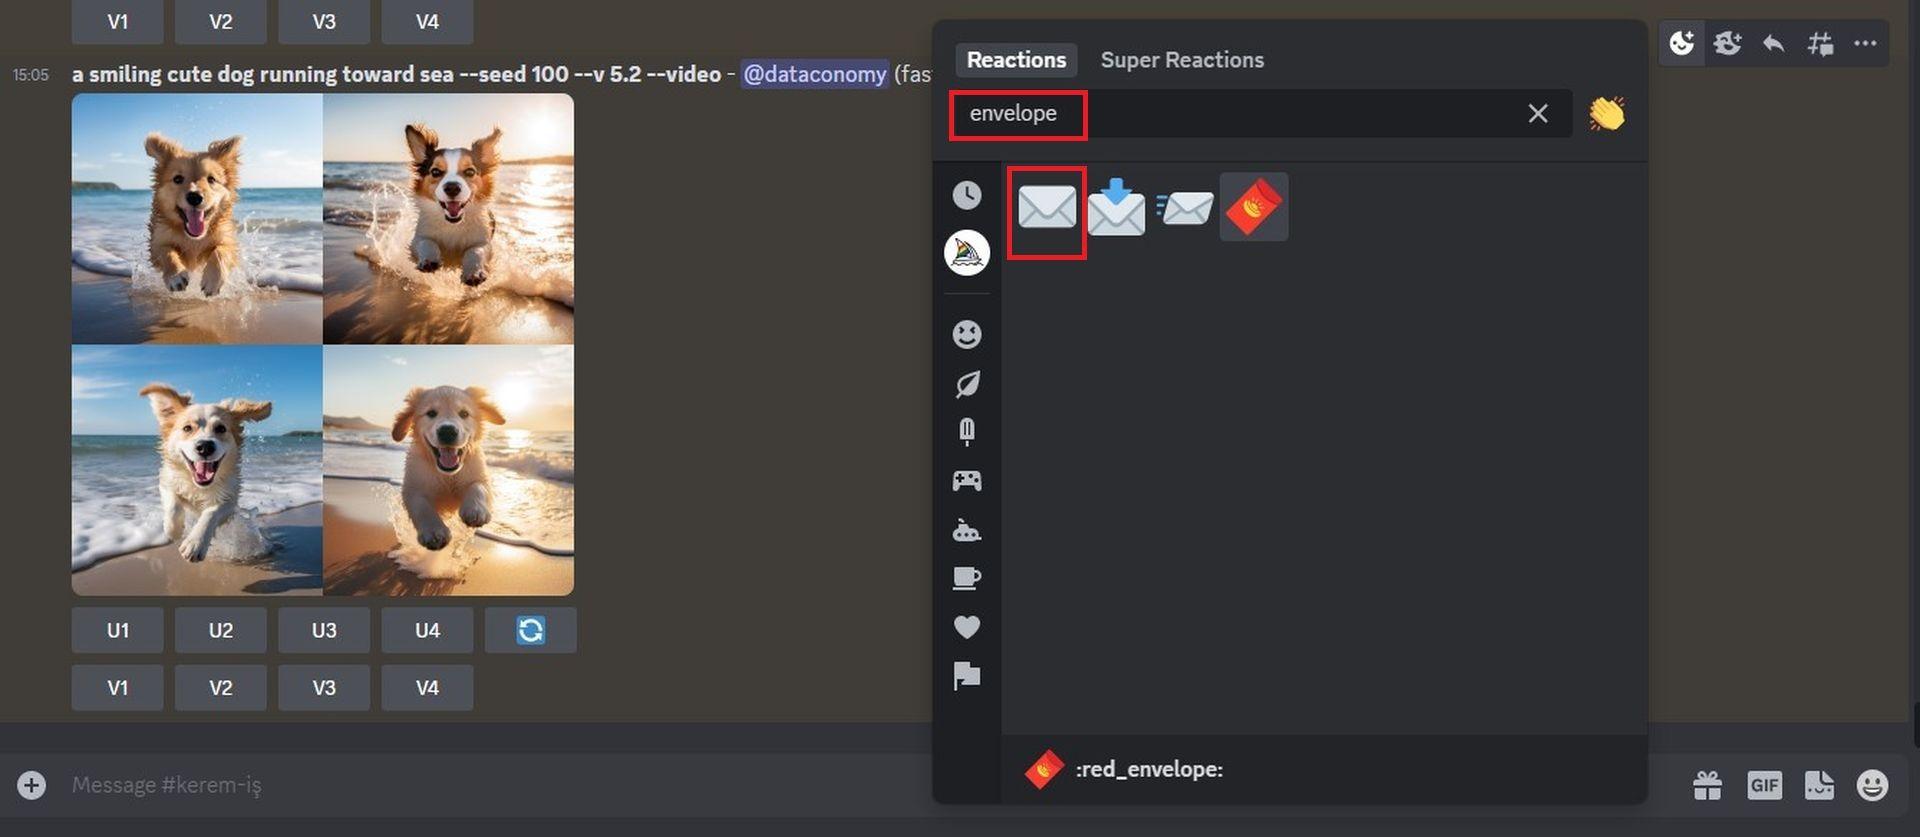
- This envelope emoji will now make an appearance underneath the original response.
- In no time, Midjourney will share another response teeming with detailed info about your generated images. Within this information goldmine, you’ll discover a link next to the “Video:” section – your ticket to the Timelapse movie that Midjourney has created from your images.
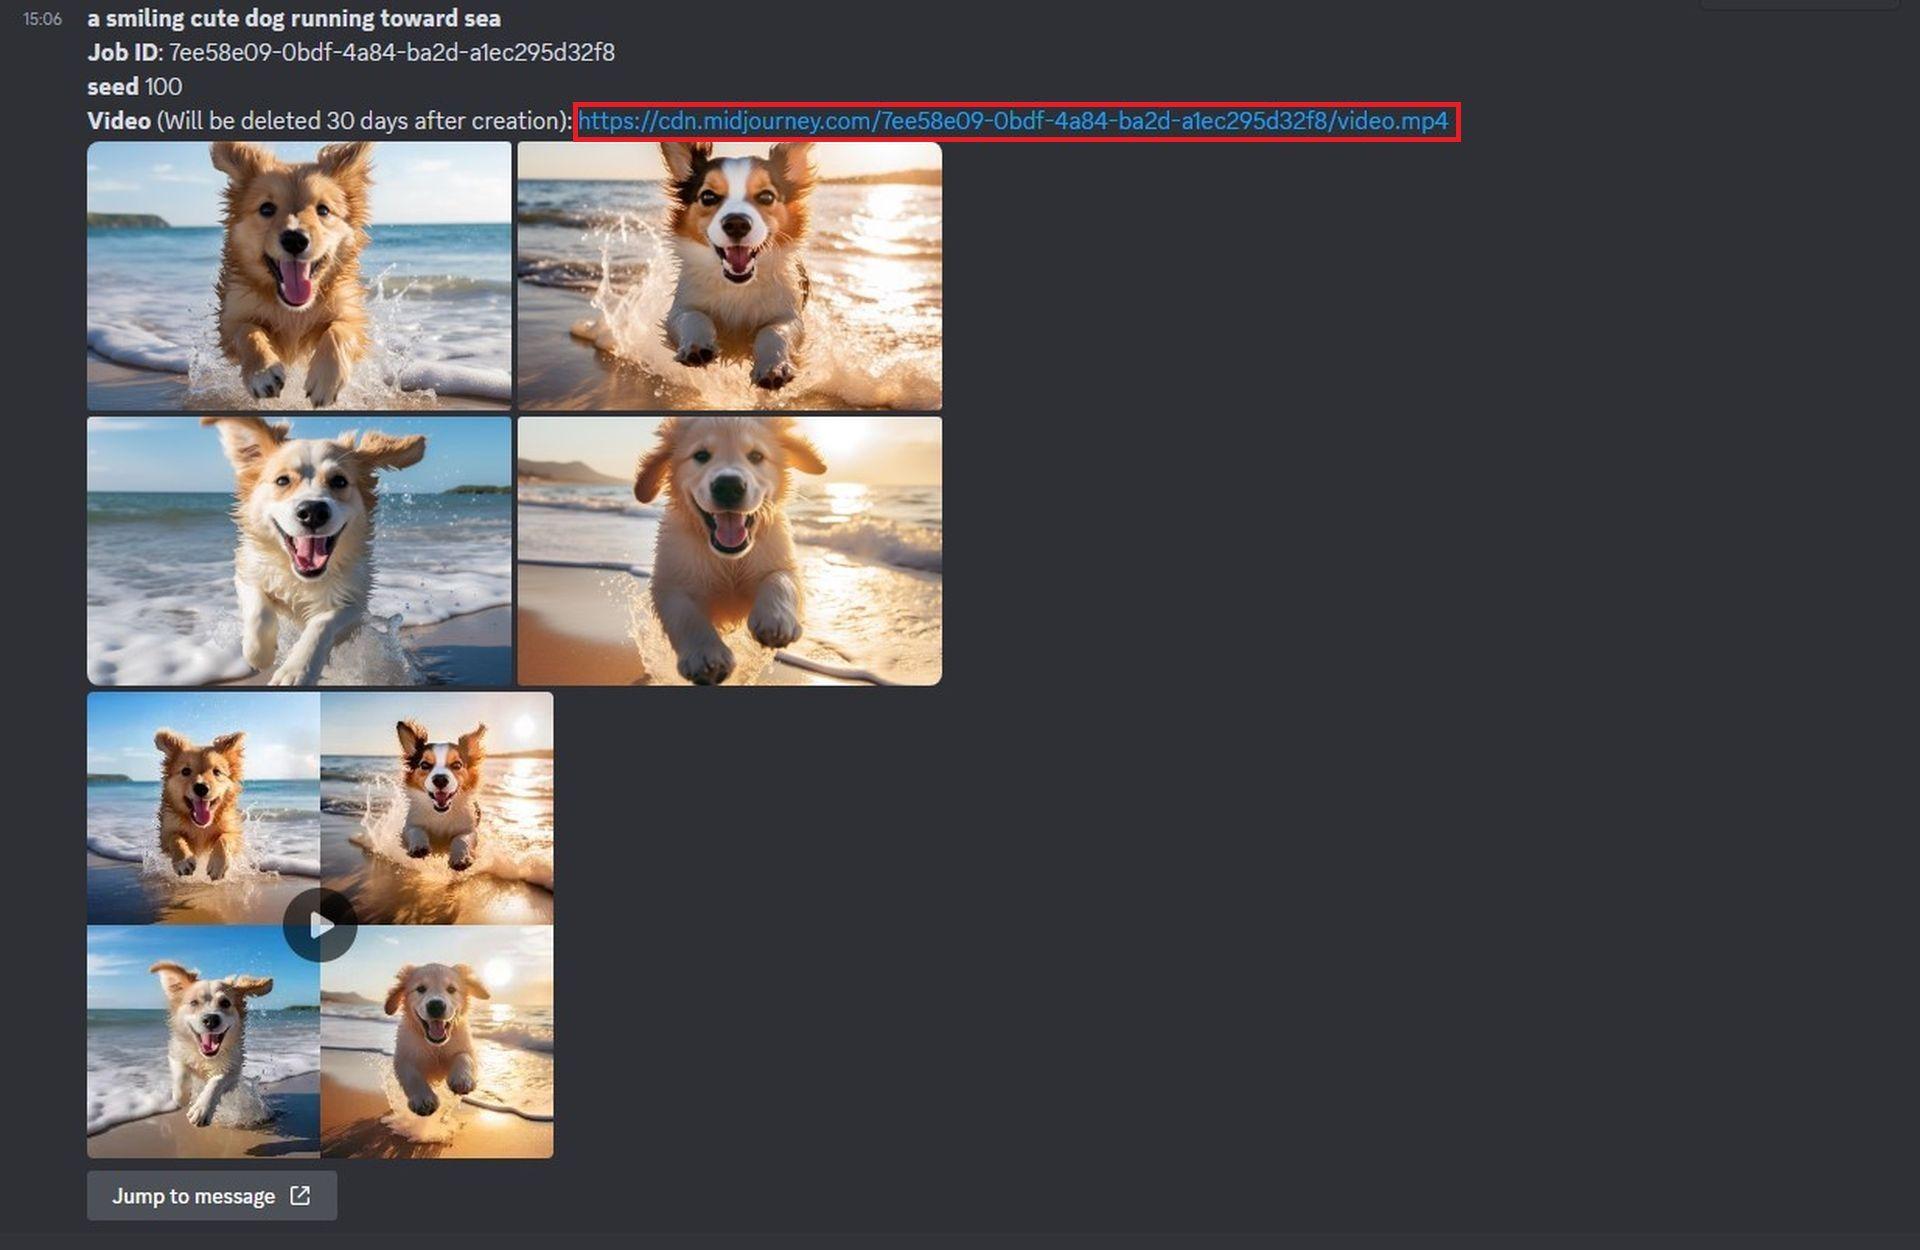
- Click on the video link and get ready for a visual treat. The generated timelapse video will commence playing in a new browser tab.
Solution 2: Prompts that has no pre-defined seed value
If you previously spun up images without pre-setting a seed value in your prompt, fret not. You can still craft a video, but only after you have procured the original seed values. Here are the steps to follow:
- Access the Midjourney server, Bot, or your Discord DM where your earlier set of images was brought to life, and identify those images you previously generated.
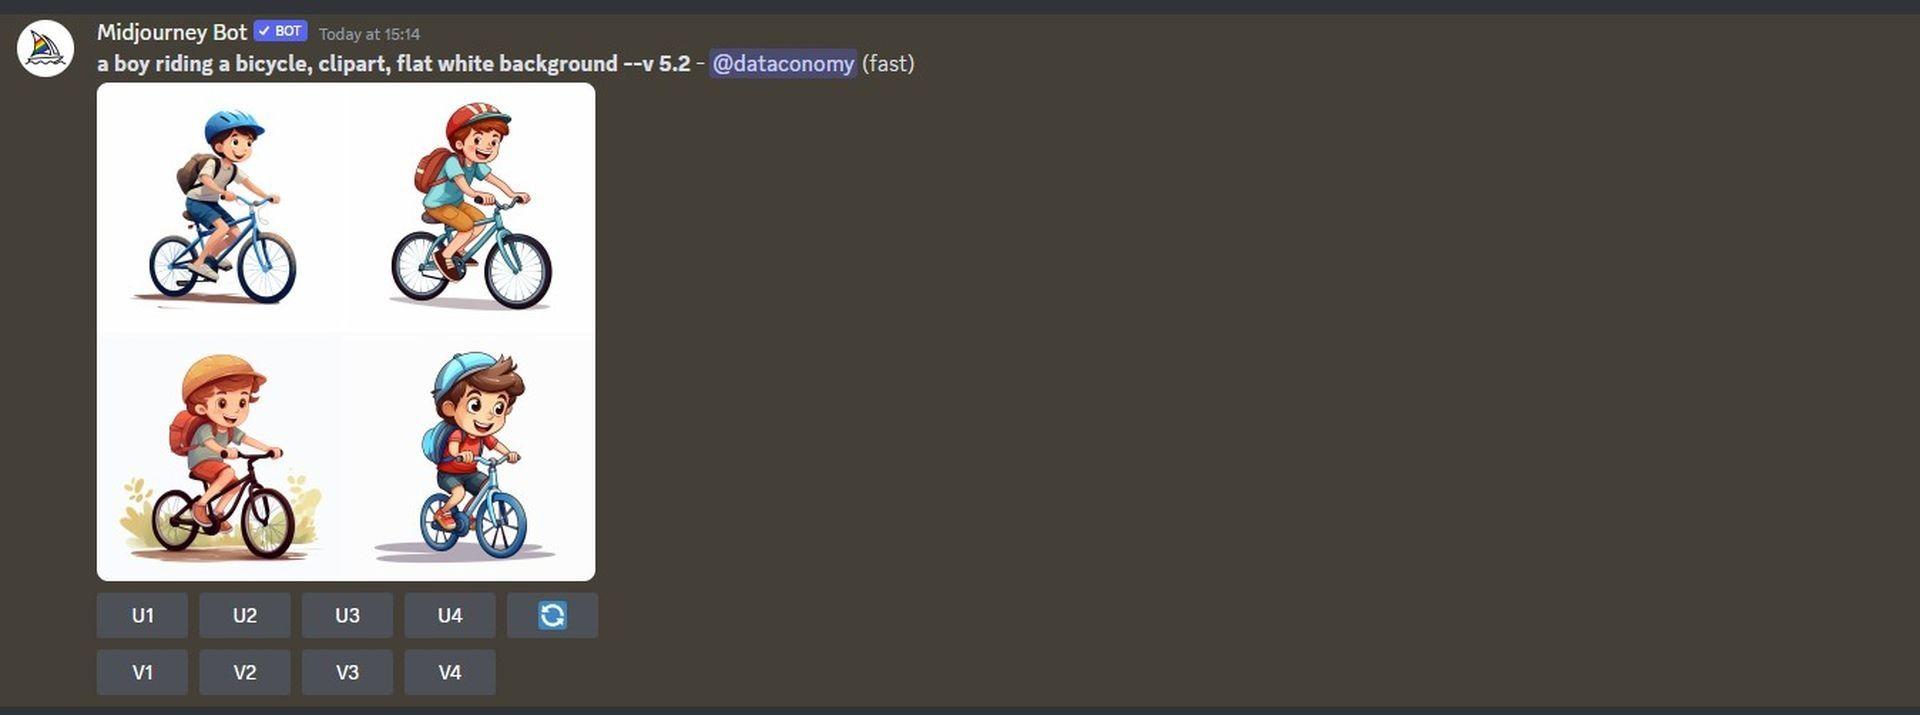
- Once you locate the original image grid, hover over the response containing it and click on the Add Reaction button – the friendly emoji icon carrying a plus sign, located at the top right corner of Midjourney’s response.
- Upon opening the Reactions menu, type “envelope” in the search bar at the top of the menu and click on the first envelope emoji that emerges in the search results.
- This envelope emoji will now show up underneath the original response. Almost immediately following your reaction, Midjourney will present another response overflowing with detailed info about your generated images.
- Within this abundance of information, discover the unique seed value that was allocated to the image grid by seeking out the number next to the “seed” section. In order to recreate your original batch of images, remember to copy the number next to “seed” from Midjourney’s response and note it down for future use.
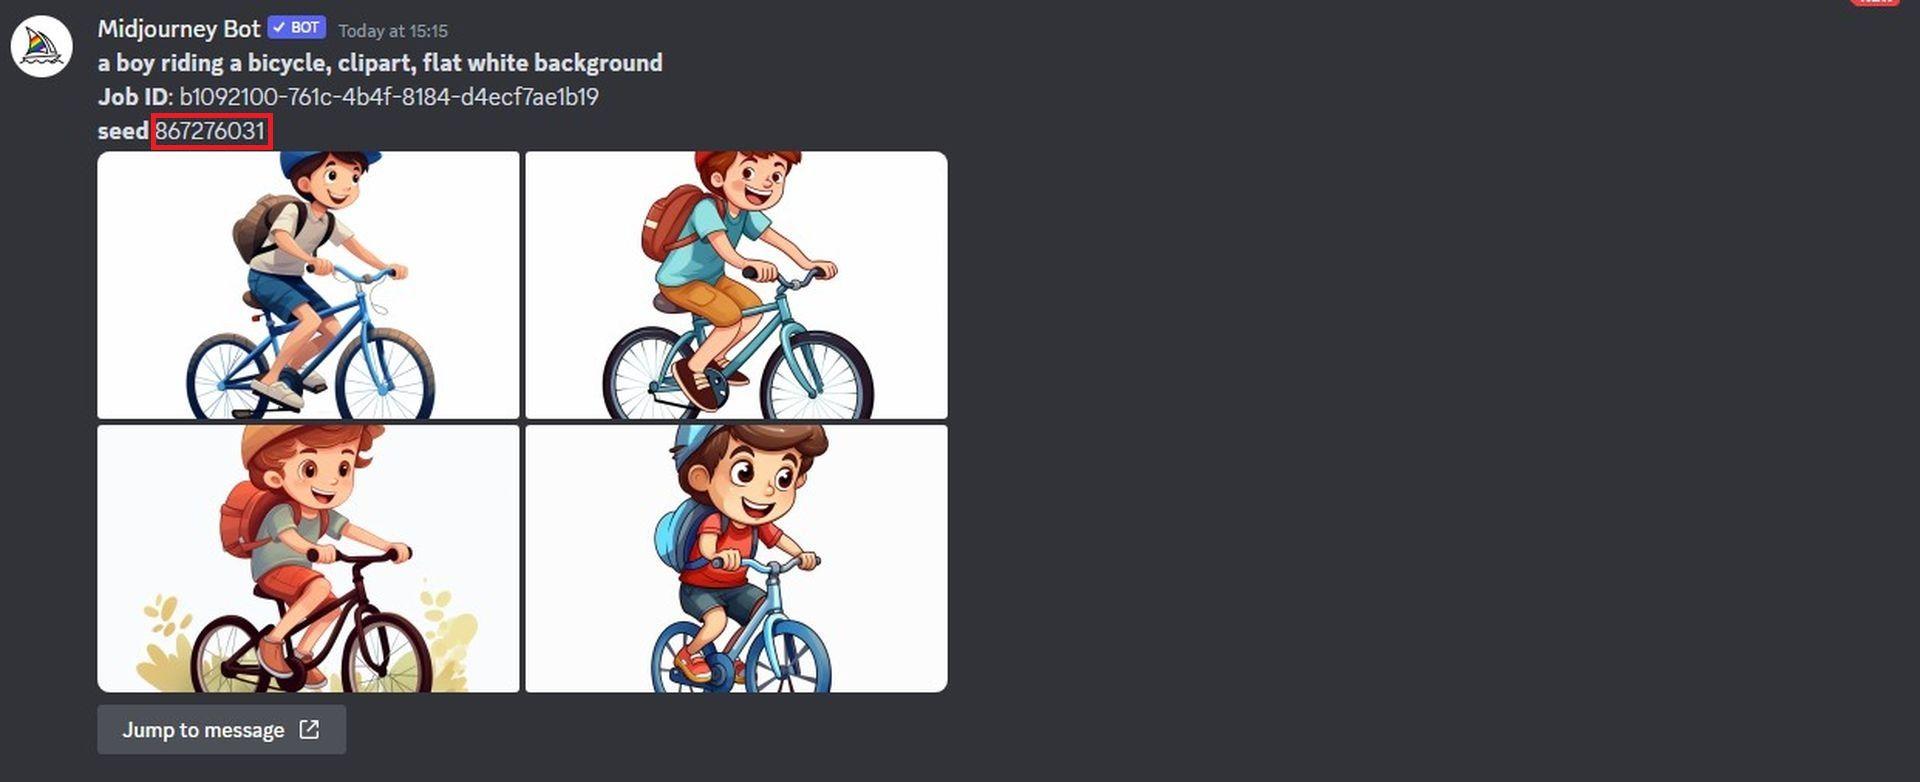
- The subsequent step is to unearth the original prompt used for the generated images. Click on Jump to message underneath the latest response to achieve this.
- This will transport you to the response housing the original image grid. From here, select and copy the entire prompt located above the image grid.
- Now, place your cursor in the text box at the bottom, input /imagine, and select the /imagine option from the menu.
- Within the “prompt” box, paste the prompt you copied in the previous step. But don’t rush to send the request just yet.
- Post pasting the original prompt, you must enter the seed value that you had copied earlier. To stipulate the seed value, type –seed value – here, substitute “value” with the seed number you copied earlier.
- Add –video to the end of this prompt and then hit the Enter key on your keyboard.
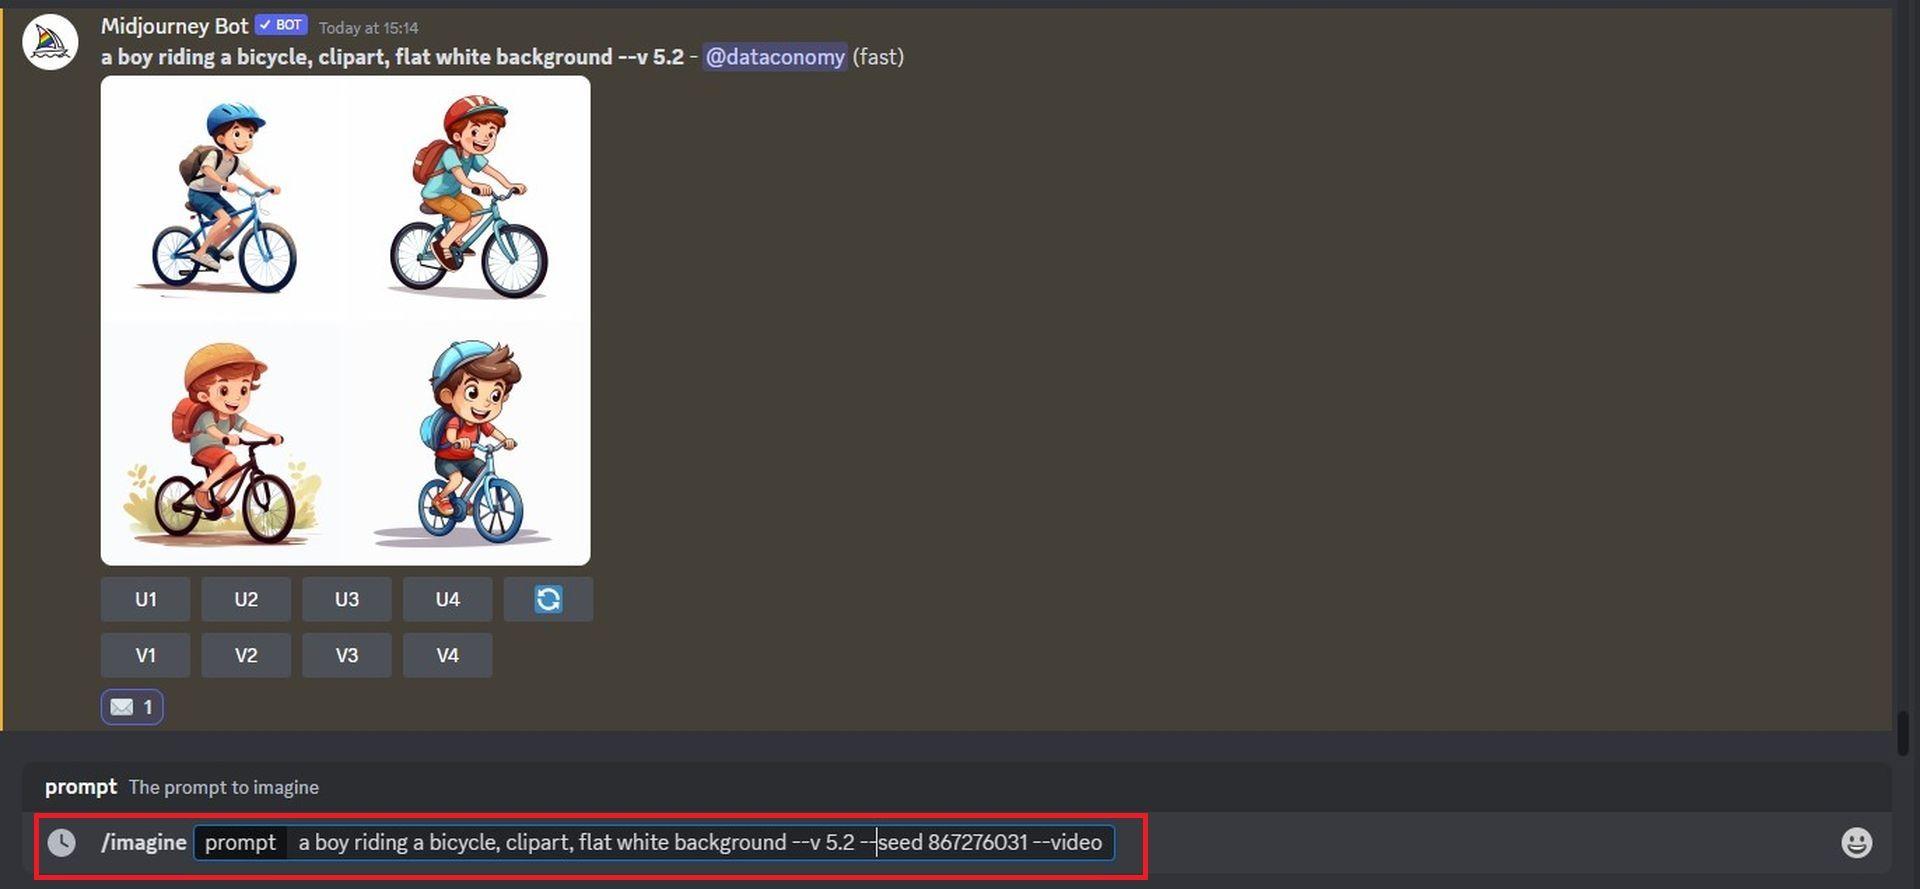
- Then the whole “envelope” process starts all over again. Midjourney will now recreate the previously generated images in a fresh response. As soon as the image grid is fully processed, hover over this response and click on the Add Reaction button – the beaming emoji icon adorned with a plus sign, positioned at the top right corner of Midjourney’s response.
- Upon opening the Reactions menu, type “envelope” in the search bar at the top and select the first envelope emoji that appears in the search results.
- This envelope emoji will now materialize underneath the original response.
- In the blink of an eye, Midjourney will share another response loaded with detailed info about your generated images. Look for a link next to the “Video:” section within this treasure trove – this is the link to the Timelapse movie that Midjourney has crafted from your images.
- Click on the video link and prepare to be wowed. The generated Timelapse video will start playing in a new browser tab.
How to save Midjourney videos?
And just like that, with the magic of the –video parameter and a simple envelope emoji reaction, Midjourney creates a gateway to an astounding timelapse video crafted from your AI-generated images. When ready to lay claim to your digital masterpiece, simply click on the link nestling next to the “Video:” section in Midjourney’s detailed response.
The moment you click on the video link, a Leaving Discord box makes its appearance. Fear not, simply proceed by clicking on Visit Site, located at the bottom right corner of the box.
Instantly, Midjourney whisks you off to a new tab on your web browser, where your generated timelapse video, your Midjourney video, springs into action. To permanently capture this magical motion of AI artistry, right-click anywhere on the video and select the Save Video As option from the overflow menu.
As your web browser completes the download, an MP4 file appears, tucked safely in your computer’s default downloads location. The Midjourney video, a mesmerizing memento of your journey through AI-powered image creation, is now yours to revisit, share, and enjoy. Welcome to the future of AI-generated artistry, courtesy of Midjourney.
All screenshots in this post have been taken from our private Discord server.
Featured image credit: Kerem Gülen/Midjourney


