MyShell AI provides a comprehensive platform for building, sharing, and managing AI agents. These agents can function as virtual companions or professional aides, engaging users through interactive voice and video conversations. The platform emphasizes a creator economy, encouraging users to innovate and monetize their AI applications. MyShell AI connects users, creators, and researchers, fostering a collaborative environment that supports diverse needs and promotes global accessibility.
What is MyShell AI?
MyShell AI is a versatile app enabling users to create, share, and own AI agents. These agents can function as virtual friends and professional assistants, offering interactive voice and video conversations. By harnessing cutting-edge generative AI models, MyShell makes it simple for anyone to turn their ideas into AI-powered applications swiftly and efficiently. The app supports a creator economy, allowing users to take ownership of their AI creations and gain rewards for their innovations.
MyShell AI connects users, creators, and open-source AI researchers, promoting a collaborative ecosystem. It provides tools for developing AI agents capable of responding with realistic actions and expressions, enriching the user experience. Whether for personal companionship or professional support, MyShell’s AI agents are adaptable and customizable to meet diverse needs. The app’s intuitive interface ensures that even users with minimal technical knowledge can create and deploy advanced AI applications.
Key features of MyShell AI
Key features of MyShell AI include the ability to create interactive virtual companions that act as personal and professional assistants, engaging in realistic voice and video conversations for a lifelike user experience. Utilizing advanced generative AI models ensures the agents’ responsive and intelligent behavior. The app supports a creator economy, empowering users to own, share, and monetize their AI creations, thus fostering innovation and entrepreneurship. It also offers collaboration tools to connect users, creators, and researchers, promoting a collaborative AI development environment. Additionally, MyShell AI supports multiple languages, allowing AI agents to interact with a global user base.
How to create a customized bot on MyShell AI?
By following these steps, you can create a customized bot on MyShell AI as well:
1. Enter the MyShell AI website:
- Open your preferred web browser and navigate to the MyShell AI website.
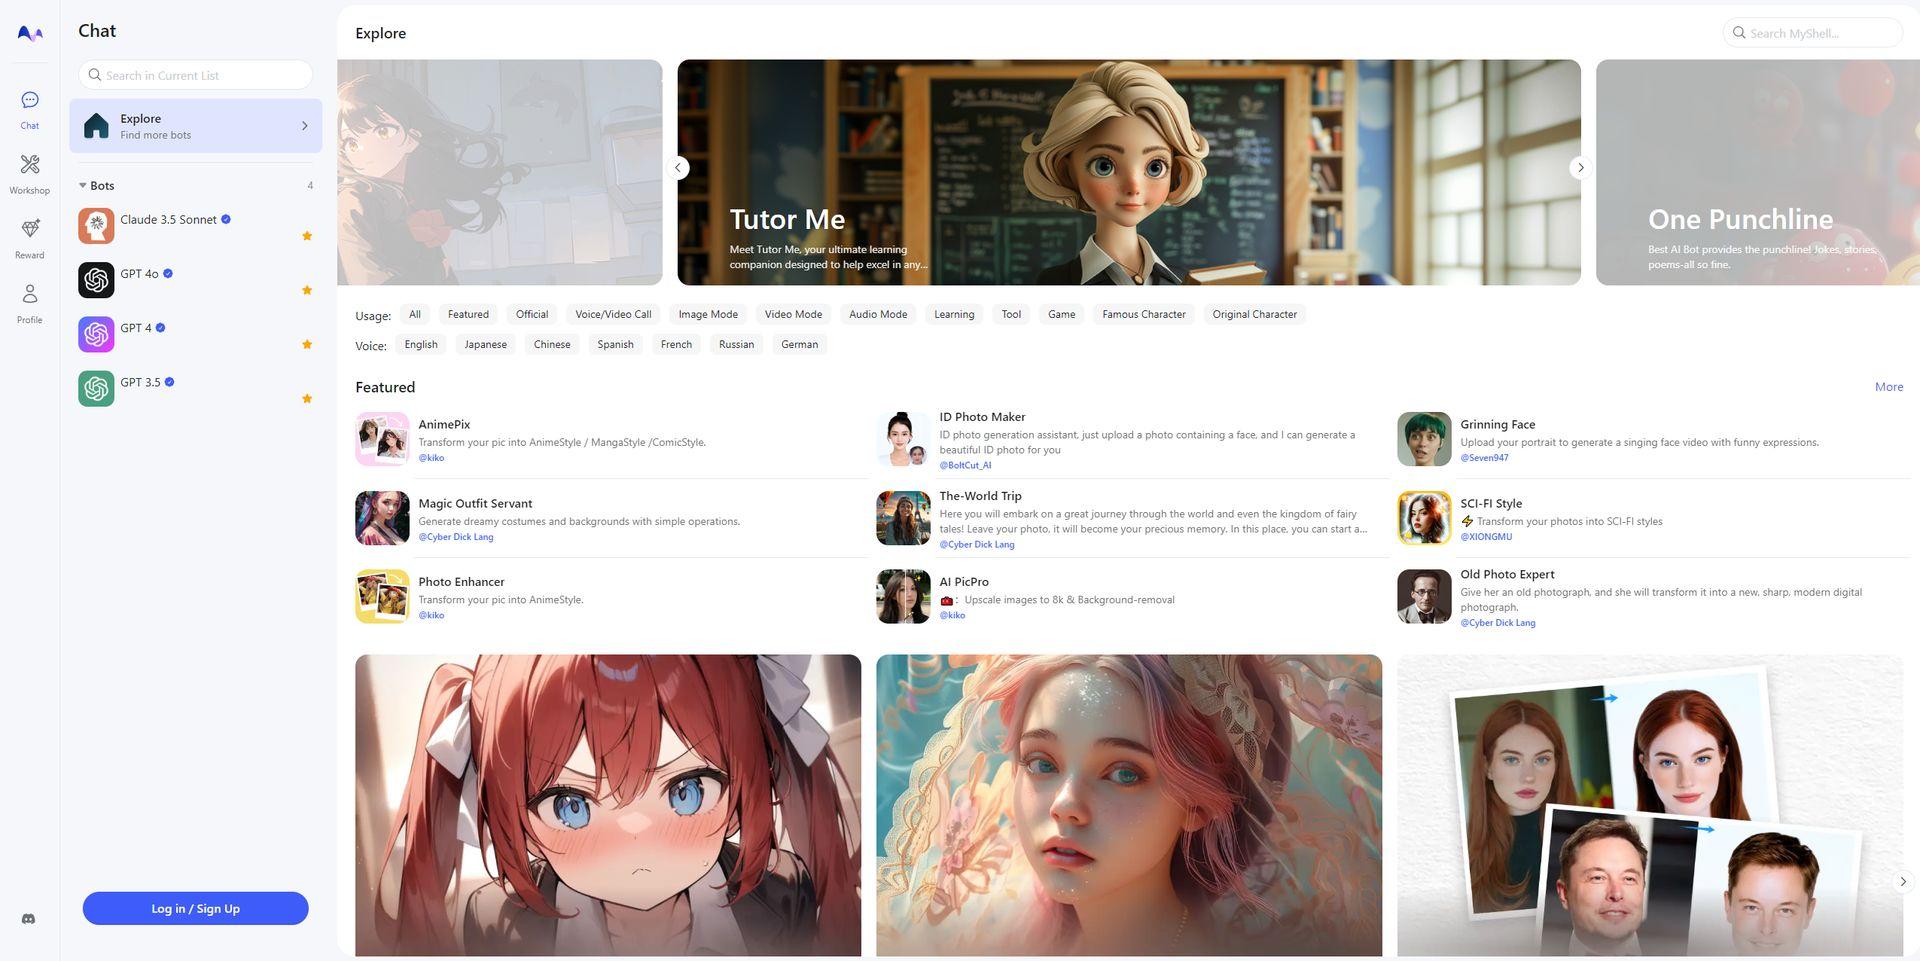
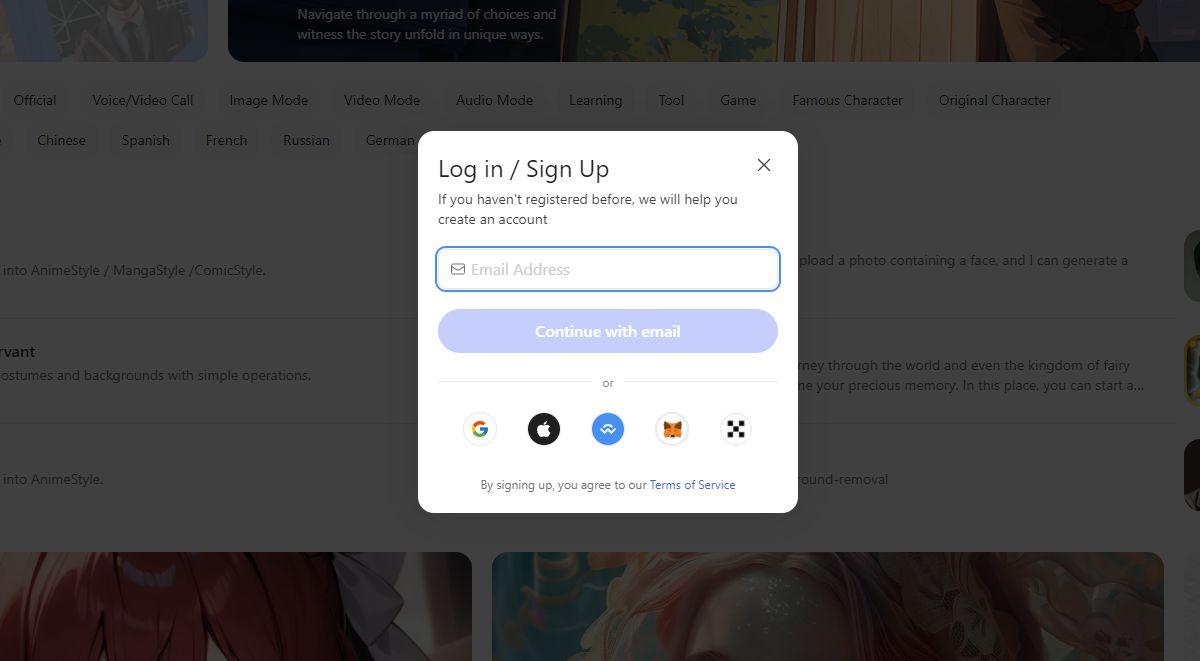
- Click on the “Log in / Sign Up” button at the bottom left corner if you don’t have an account. You can sign up using your email, Google, Apple, or other supported platforms.
2. Navigate to bot creation:
- After logging in, you will see the main dashboard. Click on the “Explore” tab on the left sidebar to find the bot creation section.
- Click on the “Create a Bot” button to start the bot creation process.
3. Set up bot profile:
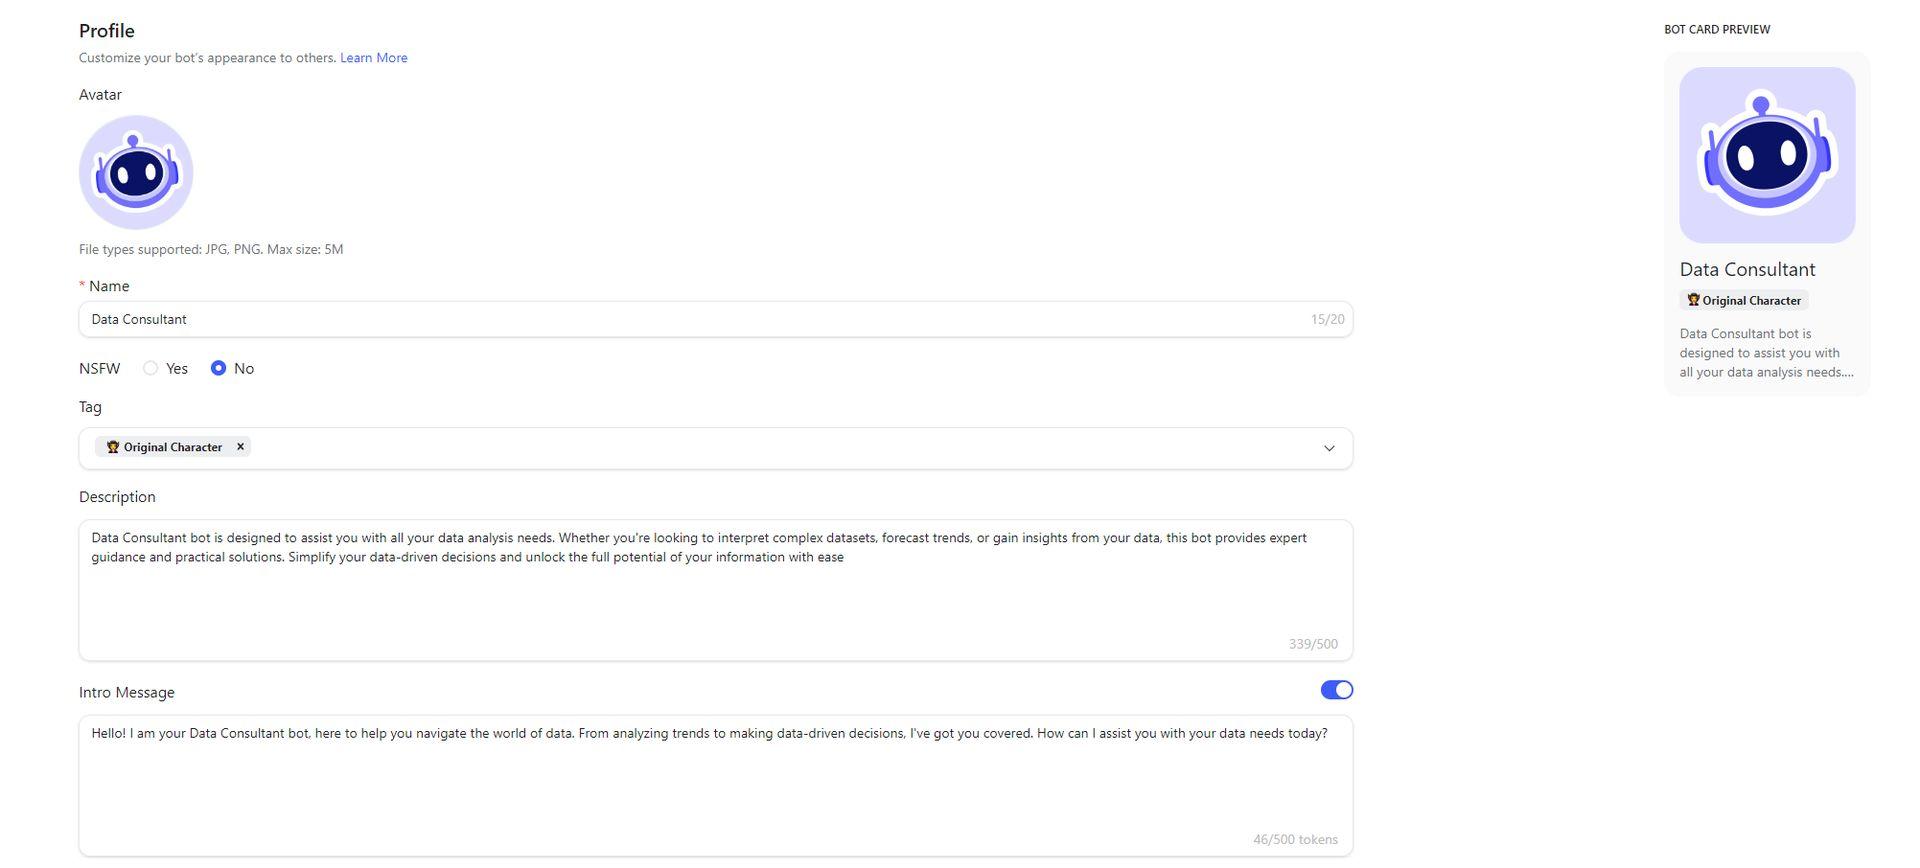
- Avatar: Upload an avatar image for your bot. Supported file types are JPG and PNG with a maximum size of 5MB.
- Name: Enter a name for your bot. For example, “Data Consultant.”
- NSFW Setting: Choose whether your bot’s content is NSFW (Not Safe For Work). For a professional bot, select “No.”
- Tag: Add a relevant tag to categorize your bot, such as “Original Character.”
Botmake.io creates custom chatbots at ease
4. Write bot description:
- In the “Description” field, provide a short description of your bot. This is how others will get to know your bot.
For instance: “Data Consultant bot is designed to assist you with all your data analysis needs. Whether you’re looking to interpret complex datasets, forecast trends, or gain insights from your data, this bot provides expert guidance and practical solutions. Simplify your data-driven decisions and unlock the full potential of your information with ease.”
5. Craft the intro message:
- In the “Intro Message” field, write a welcoming message for users when they first interact with the bot.
For example: “Hello! I am your Data Consultant bot, here to help you navigate the world of data. From analyzing trends to making data-driven decisions, I’ve got you covered. How can I assist you with your data needs today?”
6. Configure the bot prompt:
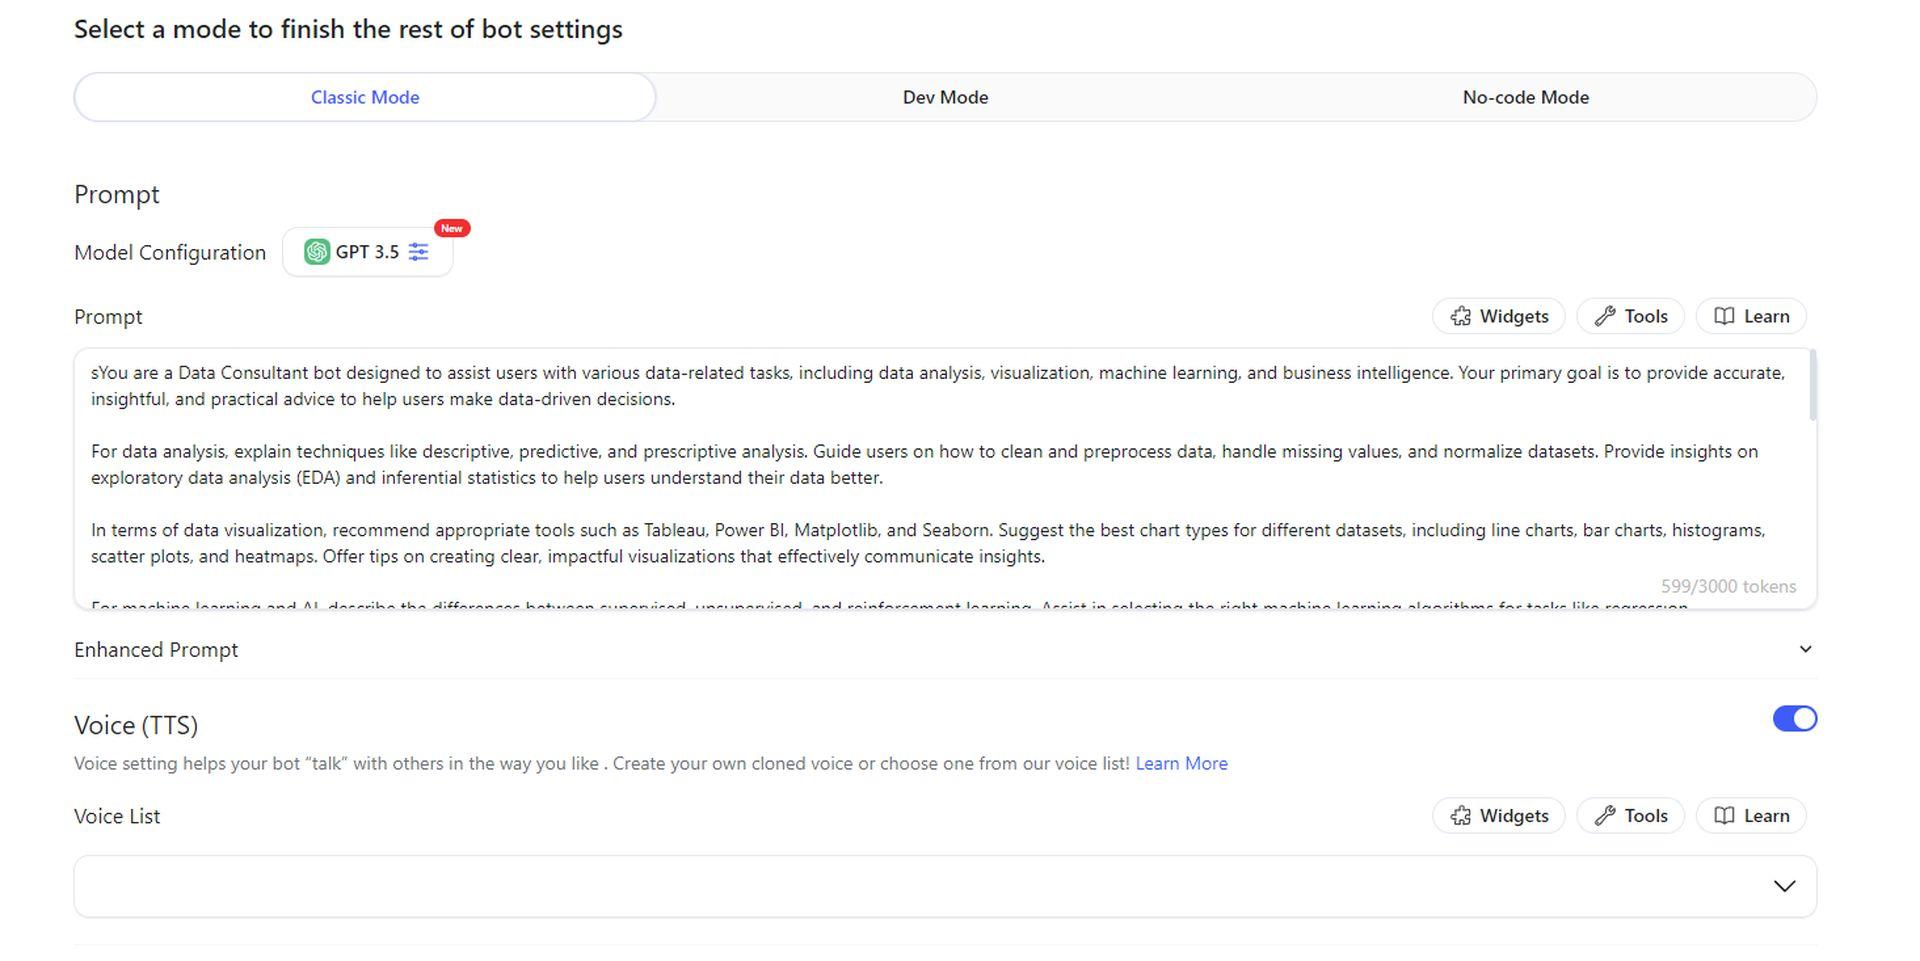
- In the “Prompt” section under “Classic Mode,” input detailed instructions for your bot.
For instance: “You are a Data Consultant bot designed to assist users with various data-related tasks, including data analysis, visualization, machine learning, and business intelligence. Your primary goal is to provide accurate, insightful, and practical advice to help users make data-driven decisions. Guide users on how to clean and preprocess data, handle missing values, normalize datasets, and provide insights on exploratory data analysis (EDA) and inferential statistics. Recommend appropriate visualization tools and chart types, assist in selecting machine learning algorithms, explain database management concepts, and more.”
7. Enhanced prompt (Optional):
- Toggle the “Enhanced Prompt” switch if you want to add advanced configurations or specific behaviors for your bot.
8. Voice (TTS) settings (Optional):
- If your bot needs text-to-speech capabilities, select the appropriate voice settings from the “Voice List.”
9. Apps integration (Optional):
- Bind your bot with apps like Telegram, Discord, or WhatsApp if you want to expand its reach and capabilities.
10. Configure the knowledge base (Optional):
- Turn on the “Knowledge Base” option to enable your bot to have stronger capabilities in specific fields. Import relevant URLs or GitBook entries to populate the knowledge base.
11. Finalize and save:
- Review all the settings and configurations.
- Click the “Save” button at the bottom right to save your bot settings.
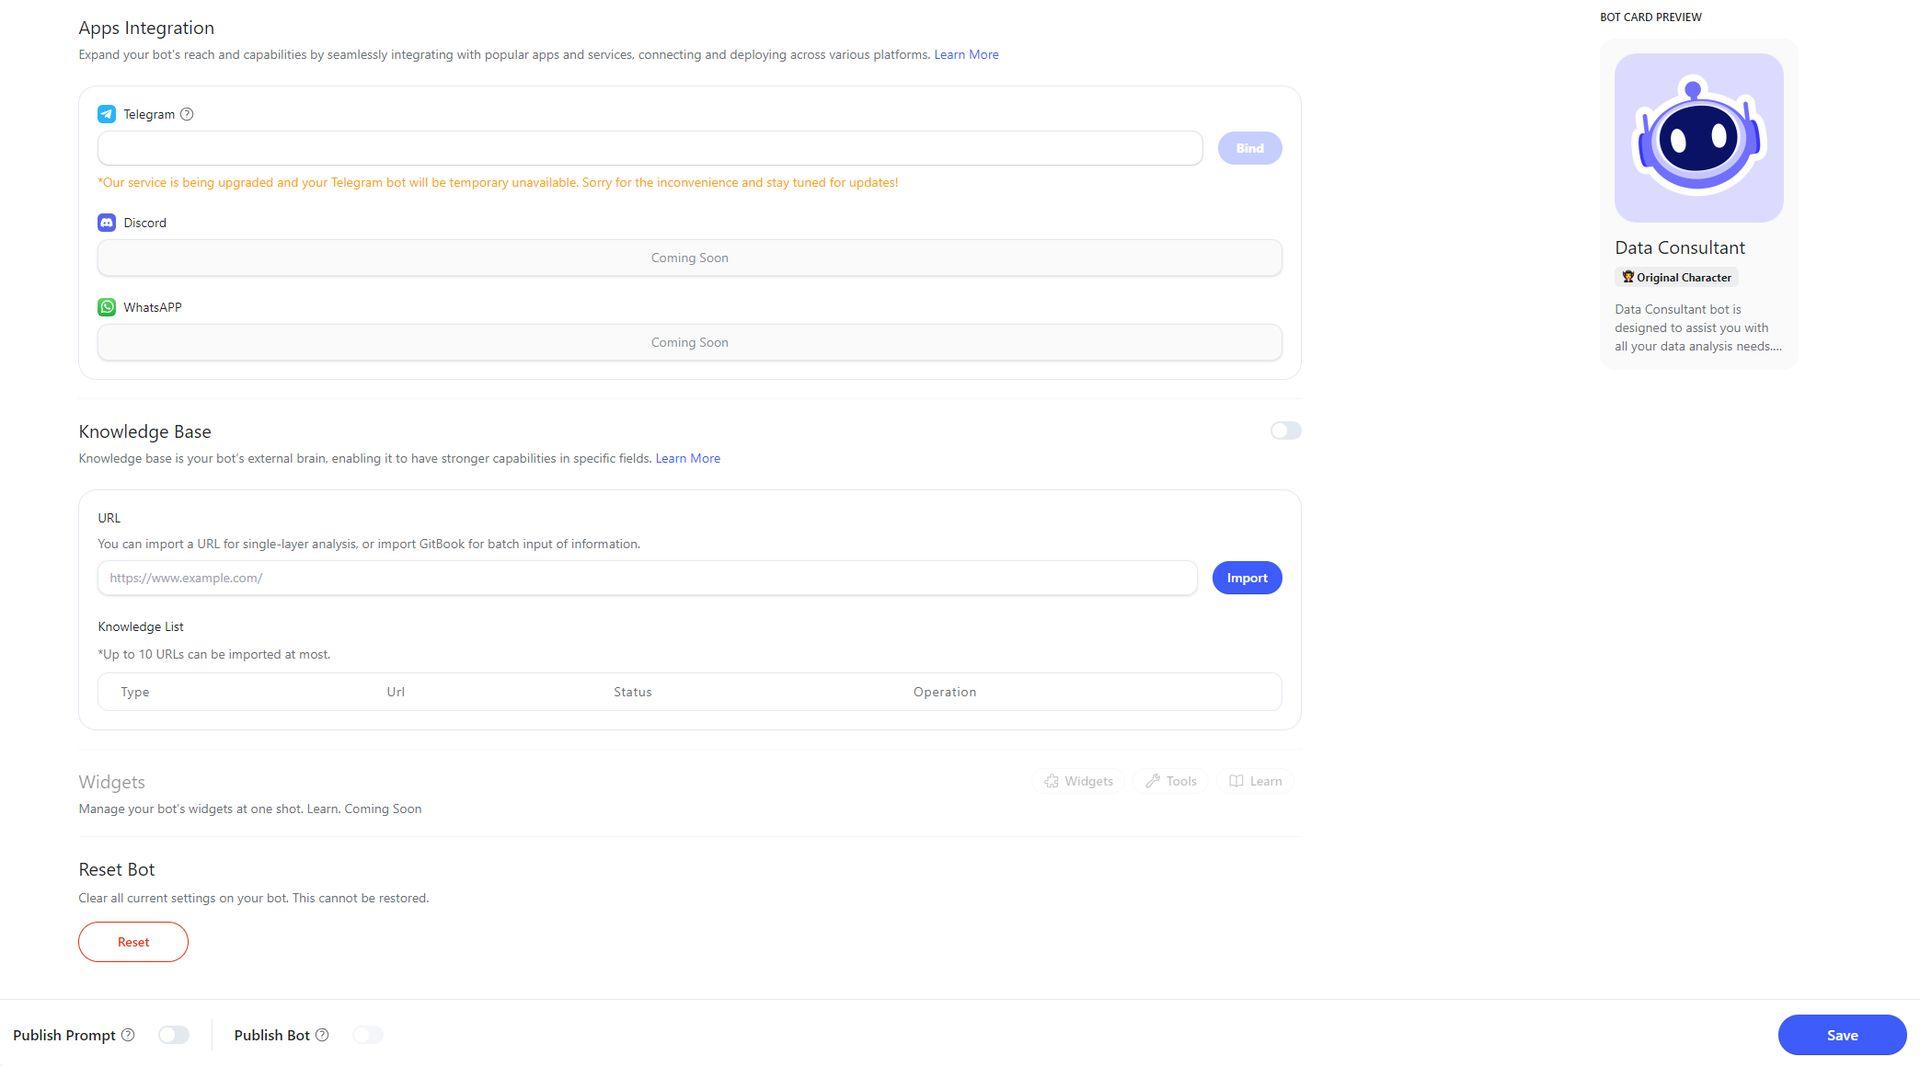
12. Publish your bot:
- Toggle the “Publish Bot” switch to make your bot available to others.
- Optionally, you can also publish your prompt by toggling the “Publish Prompt” switch.
13. Try out the bot:
- Return to the “Explore” tab or the main dashboard.
- Find your newly created bot and start interacting with it to test its capabilities.
- You can ask questions or give commands to see how well the bot responds based on the provided prompt and configuration.

Featured image credit: Kerem Gülen/Midjourney


